Hiking and backpacking power essentials: The ultimate off-grid guide
Staying powered up on the trail is no longer just about convenience—it’s about safety. Whether you’re a weekend warrior or a thru-hiker tackling the PCT, your “tech stack” needs to be as calculated as your base weight. Keeping your phone, GPS, and headlamp running requires a reliable system that balances portable charging with smart energy management.
This guide breaks down backpacking power systems, the latest ultralight solar panels, and the navigation tech you need to stay found and connected in the backcountry.
Backpacking power systems: Solar, battery banks, and safety
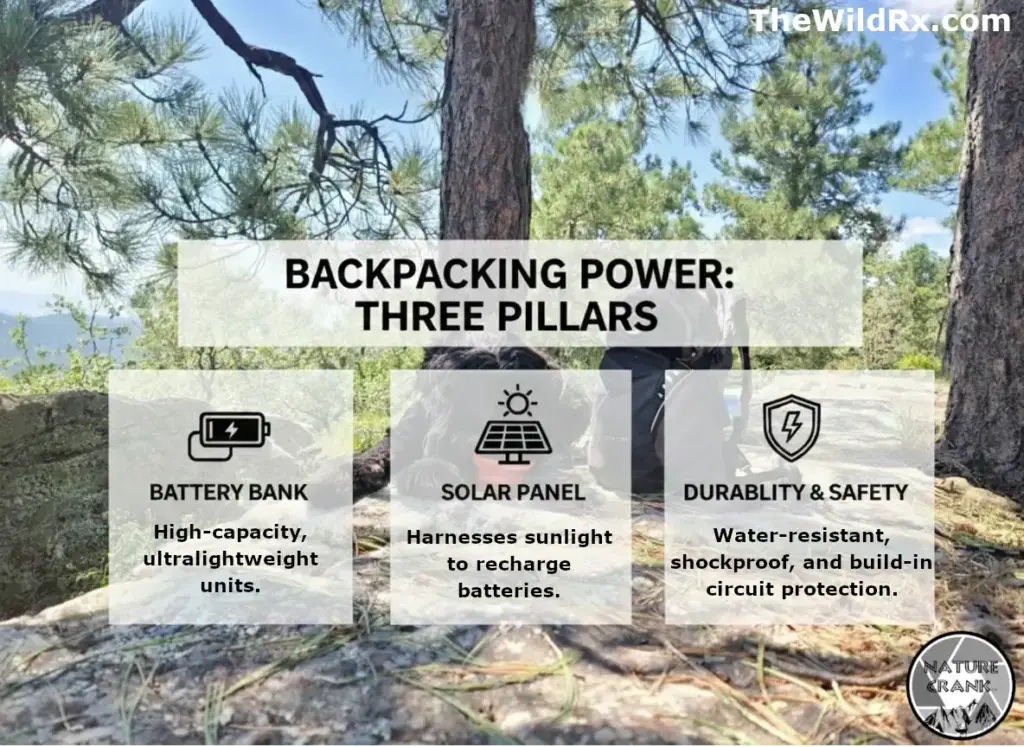
A reliable wilderness power system is built on three pillars: storage, generation, and protection. For most hikers, this means a “buffer” setup where a solar panel recharges a battery bank, which then charges your devices at night.
Choosing the right battery bank
For ultralight backpacking, prioritize the best mAh-to-weight ratio to minimize pack weight while ensuring multiple device charges. Top picks focus on 10,000mAh models under 6 ounces for multi-day and thru-hikes.
- Anker PowerCore Slim series or similar 10,000mAh models (~6-7 oz): Reliable, affordable, and widely available with strong PD output—great value for hikers who want dependable charging without premium pricing. Anker.com
- Nitecore NB10000 Gen 4: This is currently the lightest 10,000mAh bank on the market (~5.3 oz). It features a carbon fiber frame and improved cold-weather performance. Nitecore.com
- BioLite Charge 40 PD: A rugged option that supports USB-C Power Delivery (PD) for faster charging of larger devices like cameras or tablets. Bioliteenergy.com
Avoid heavier “mini power stations” like the Jackery Explorer 100 Plus (~2.1 lbs) unless you need AC outlets or higher capacity for group/base camp use. Stick to certified, lightweight lithium-ion banks for thru-hikes.
Safety and lithium-ion care
Lithium batteries are sensitive to the elements. To ensure your gear lasts the entire trip:
- Temperature control: Keep your power bank in your sleeping bag on cold nights. Lithium batteries lose efficiency and can even be permanently damaged if charged in sub-freezing temperatures.
- Waterproofing: While many newer banks like the NestOut series have high IP-ratings (IP67), always store your electronics in a dedicated dry bag.
- The 80% rule: Don’t expect 10,000mAh to give you 10,000mAh of actual juice. Expect about 20% loss due to heat and voltage conversion.
Best ultralight solar panels for hikers and thru-hikes
When choosing a panel, don’t just look at the advertised wattage—look at the real-world yield. A “28W” panel rarely puts out 28W; due to atmosphere, angle, and heat, you should expect about 50–70% of that rated power. For backpacking, aim for panels under 1.5 lbs with 10-28W for effective trickle or midday charging.
How many watts do you actually need?
To understand your needs, you have to look at your daily mAh drain. Here is a realistic breakdown of what common trail electronics consume in a 24-hour period:
| Device | Average Battery Capacity | Daily Trail Drain (Estimated) |
| Smartphone (Maps/Photos) | 3,300 – 4,500 mAh | 2,500 – 3,500 mAh |
| Satellite Messenger (Garmin) | 1,250 mAh | 200 – 400 mAh |
| GPS Watch (Tracking) | 300 – 500 mAh | 150 – 250 mAh |
| Headlamp (LED) | 1,500 – 2,500 mAh | 300 – 500 mAh |
| Total Daily Need | — | ~3,150 – 4,650 mAh |
The “sun hour” math
In the hiking world, we measure charging by peak sun hours (usually 4–6 hours per day).
- 10W panel: In perfect sun, it delivers about 1,200 mAh per hour. You would need 4 hours of direct, stationary sunlight to cover one day of phone use. Best for “trickle charging.”
- 28W panel (e.g., BigBlue SolarPowa): Delivers roughly 2,200 mAh per hour. You can replace a full day’s power drain in just 2 hours of midday sun. This is the “Goldilocks” zone for thru-hikers.
- 40W+ panel (e.g., Jackery SolarSaga Mini): These can charge a large 20,000mAh battery bank from empty to full in a single sunny day. Use this if you are a content creator.
Pro Tip: The 1.3x Buffer Rule
Always multiply your calculated needs by 1.3. Solar charging is only about 70–80% efficient because of heat loss and cable resistance. If your phone needs 3,000 mAh, aim to generate 4,000 mAh.
Top-rated portable solar panels for 2026
These are some of the top portable solar panels. I’ve include the Amazon link and the direct links to the product manufacturers.
| Model | Peak output | Weight | Best for |
| BigBlue SolarPowa 28W (Bigblue-tech.com) | 28W | 20.9 oz | Best overall performance; great for cloudy days. |
| Anker Solix PS30 (AnkerSolix.com) | 30W | 2.4 lbs | Durability leader; high-speed USB-C output. |
| Goal Zero Nomad 10 (Goalzero.com) | 10W | 1.2 lbs | Ultralight choice; built-in kickstand for easy angling. |
| Jackery SolarSaga 40W Mini (Jackery.com) | 40W | 2.1 lbs | Fastest charging; premium build with ETFE lamination. |
Pro-tip: Don’t hang your panel on your pack and expect a full charge while hiking through “green tunnels” (dense forest). Solar is most efficient during your lunch break or at a south-facing camp with a clear view of the sky.
Navigation and safety tech for long wilderness trips
Your phone is a great primary tool, but it shouldn’t be your only one. Dedicated GPS units offer superior battery life, better satellite reception under heavy canopy, and durability that a smartphone lacks.
Essential satellite messengers
Two-way satellite communication is the standard for remote safety.
- Garmin inReach Mini 3 Plus: Compact with color touchscreen, voice messaging, photo sharing, and SOS via Iridium network—top choice for emergency and daily check-ins on long trips.
- Zoleo Satellite Communicator: A great budget-friendly alternative that provides a dedicated SMS number for easier communication with family back home.
GPS watches and backup
- Garmin Fenix 8 / Instinct 2 Solar: These watches can provide weeks of battery life in “Expedition Mode” and allow for quick wrist-based navigation. I personally use the Garmin Instinct and the battery life has been excellent.
- Offline Maps: Always download your region in Gaia GPS or FarOut before leaving service.
Safeguarding your electronics
How are you going to be safe if you tech isn’t safe? To ensure your tech survives the trail, it is essential to prioritize electrical safety from the moment you pack. Managing moisture and battery health not only protects your investment but prevents dangerous shorts or battery fires in the backcountry.
Related: The time I accidentally invented electrical aroma therapy: Proper fusing, breakers, and bus bars
Essential electrical safety for hikers
- Water protection: Electronics and moisture are a poor combination. Even if your gear is “weather-resistant,” store all batteries, cables, and devices in a dedicated dry bag or a high-quality Ziploc bag. A small packet of silica gel inside the bag can also help absorb ambient humidity.
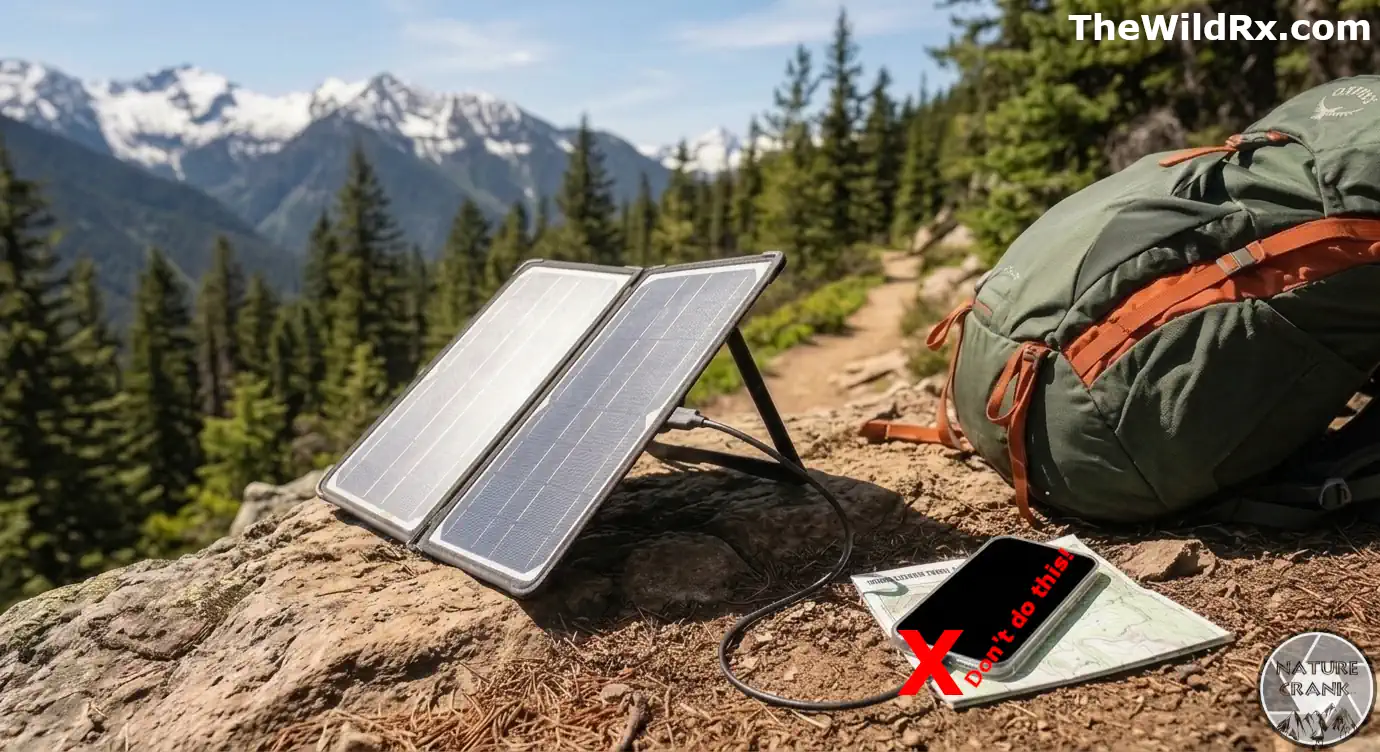
- Avoid direct-to-phone charging: Did you notice the red X on the featured image? Never plug your smartphone directly into a solar panel. Solar output fluctuates wildly with cloud cover or passing tree limbs, which causes unstable voltage. This can damage your phone’s internal charging circuitry or cause it to enter a “charging loop.” Always charge a battery bank first, then use the bank to charge your devices. While this is less likely to happen with more expensive phones, is it worth the risk?
- Temperature limits: Lithium-ion batteries can be permanently damaged by extreme heat or cold. Never charge a battery bank in sub-freezing temperatures, and avoid leaving your electronics in direct, high-noon sunlight for extended periods. If your battery bank feels hot to the touch, disconnect it immediately.
- Inspect cables and ports: Trail life is brutal on cables. Before a long trip, inspect your USB cords for fraying. If you notice a port on your device or power bank becoming loose, stop using it; a loose connection can cause arcing and heat buildup.
- Avoid cheap knockoffs: Only use certified power products (UL, CE, or FCC certified). Cheap, unbranded chargers often lack the sophisticated battery management systems (BMS) required to prevent short circuits, overcharging, and overheating.
Minimalist tech setups for multi-day hikes
If you want to keep your “electronics bag” under 1.5 lbs, efficiency is your best friend. Here is a proven minimalist loadout for a 5-day trip:
- Smartphone: Primary camera and navigation (keep in Airplane Mode).
- Nitecore NB10000: One full charge for your phone and two for your headlamp.
- InReach Mini 3: For daily check-ins and emergency SOS.
- Multi-use Cables: A single 12-inch USB-C to USB-C cable with a Lightning/Micro-USB adapter.
Frequently asked questions about backpacking power
Final thoughts on off-grid power
Mastering your power system is a rite of passage for every long-distance hiker. By understanding the balance between storage, generation, and protection, you can spend less time worrying about your battery percentage and more time focusing on the trail ahead. Remember, the best gear setup is the one that gives you the peace of mind to disconnect, explore, and stay safe in the wilderness.
What is your go-to power strategy for multi-day trips? Do you swear by the reliability of a battery bank, or have you found a solar panel setup that finally works in the “green tunnel”? Let us know your favorite ultralight tech hacks in the comments below.
If you found this guide helpful, please consider sharing it with your hiking group or on your favorite backpacking forum. Helping a friend lighten their pack and stay connected is the best way to ensure everyone makes it to the next summit safely.
Discover more from The Wild Rx aka NatureCrank™
Subscribe to get the latest posts sent to your email.