Backcountry water and food: Complete guide to self-sufficient hiking

Heading into the backcountry means carrying your entire world on your back. It’s a rewarding challenge to stay safe, energized, and responsible for days on end, but it requires some upfront legwork. Self-sufficient hikers plan their water sources, food calories, and waste management long before hitting the trailhead so they can focus on the views instead of emergencies.
This guide covers the essential systems for hydration, nutrition, and low-impact practices—the same ones I use to keep my pack light and my energy high.
The mindset of a self-sufficient hiker
Responsible backcountry travel starts with a simple realization: once you leave the trailhead, you are your own primary resource. You become the water treatment expert, the head chef, and the steward of the land.
This DIY approach isn’t just about safety; it’s about freedom. Whether you’re out for a quick weekend overnight or a months-long thru-hike, having a solid plan prevents the “bonk” (that mid-trail energy crash) and keeps the local wildlife from getting into your dinner. The goal is to test your systems on shorter trips, see what your stomach can actually handle, and adjust for the terrain ahead.
Water management: Staying hydrated and safe in the backcountry
Water is easily the most important factor for your performance. Dehydration can sneak up on you during steep climbs, and drinking from the wrong stream can lead to a very uncomfortable trip home.
Key steps for backcountry water management:
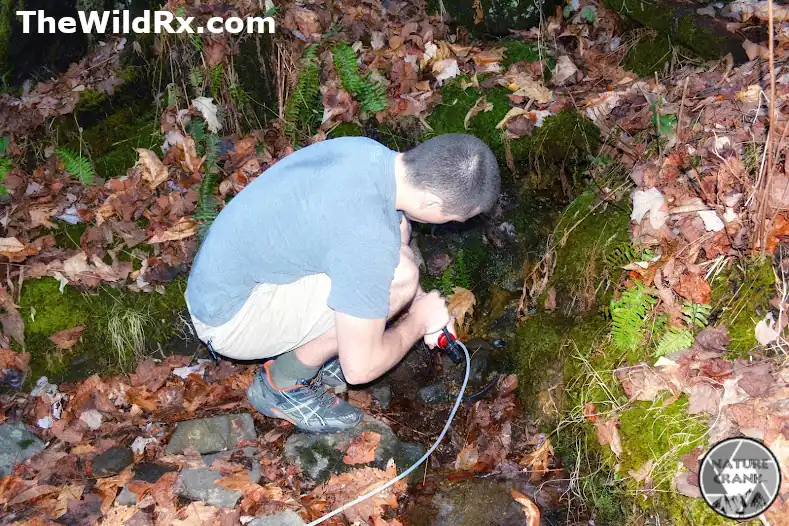
- Identify reliable sources: I always check topographical maps and GPS apps for flowing streams. Stagnant ponds might work in a pinch, but they are a last resort.
- Assess water quality: High-elevation, moving water usually looks pristine, but looks can be deceiving. Treat everything—no matter how clear it looks.
- Choose your treatment: Pick a method that fits your style. If you’re solo, a small squeeze filter is great; for groups, a gravity bag saves a lot of effort.
- Master the “camel up”: When you find a good source, drink your fill right there. It’s the easiest way to stay hydrated without carrying extra weight in your pack.
Common water purification options include hollow-fiber filters, UV pens, and chemical drops. Each has its pros and cons regarding weight and wait time.
Read the full breakdown in The backpacker’s guide to water safety: From filters to water selection.
Practical tips for hydration:
- Check recent reports: Use trail apps to see if “seasonal” streams have dried up recently.
- Always have a backup: Filters can clog, and batteries can die. I always keep a few chemical tablets in my first-aid kit as a “just in case” measure.
- Dry regions and winter: If sources are scarce, you might need to cache water ahead of time or factor in the extra fuel needed to melt snow.
Backcountry nutrition: How to fuel your trek
Hiking is hard work, and your appetite will eventually catch up to you. Most backpackers need between 2,500 and 4,500 calories per day. If you’re hitting big miles, you might even cross the 5,000-calorie mark. To keep your pack from feeling like a lead weight, focus on caloric density—aim for foods that offer 100–150 calories per ounce.
Finding your macronutrient balance
While everyone is different, most hikers find success with this rough split:
- 50–60% Carbohydrates: Your “fast fuel” for the climbs.
- 20–30% Fats: Long-burning energy (think nuts and olive oil).
- 20–25% Protein: Essential for muscle recovery once you’ve set up camp.
Are you a vegetarian or like me and can only eat so much tuna fish? See our guide on vegetarian meal options.
Choosing a backcountry cooking style
How you eat is a personal choice that changes the vibe of your trip.
| Aspect | Cold-soaking | Stove cooking |
| Gear weight | Ultralight (just a plastic jar) | Heavier (stove, fuel, pot) |
| Patience level | 10–30 mins (plan ahead) | 5–15 mins (instant gratification) |
| Best for | Summer miles and minimalists | Cold mornings and morale boosts |
| Calorie efficiency | Great for dehydrated staples | Great for variety and fresh adds |
| The reality | No hot coffee or warm meals | You have to carry and manage fuel |
Learn more:
- Thru-hiking nutrition: Cold-soaking vs. stoves
- Dehydrating your own meals: A beginner’s guide to home prep
Environmental stewardship: Protecting the wilderness
Being self-sufficient also means being a good guest. Poor habits can pollute the very water we drink and habituate animals to human food, which rarely ends well for the animal. The full explainer on these leave no trace principles is here, but here’s the abbreviated version.
Leave No Trace (LNT) habits for the trail:
- Pack it in, pack it out: This includes the tiny things—orange peels, nut shells, and even used tea bags. If you brought it, it leaves with you.
- The 200-foot rule: Do your dishes and set up your “bathroom” at least 200 feet (about 70 big steps) away from any water source.
- Biodegradable soap isn’t “free”: Even eco-friendly soap needs soil to break down. Never use it directly in a stream; instead, scatter your soapy water far from the bank.
- Proper waste disposal: Dig a “cathole” 6 to 8 inches deep and cover it well. It’s not the most glamorous part of hiking, but it’s the most important for keeping trails open.
Gear essentials: Tools for the journey
You don’t need the most expensive gear, but you do need gear you can trust. Beyond the Ten Essentials, focus on these specific items for your food and water systems:
- Water storage: A mix of a collapsible bladder for camp and a sturdy bottle for the trail works best.
- Primary and backup treatment: A reliable filter plus a few backup tablets.
- Smart food storage: Check the local rules. Some areas require bear canisters, while others allow hanging bags or Ursacks.
- Kitchen basics: A long-handled titanium spoon is a game-changer for eating out of pouches without getting food on your hands.
- Electrolytes: Plain water is great, but adding electrolytes helps prevent fatigue and cramps on hot days.
Frequently asked questions about backcountry water and food
The link between physical fuel and mental health
Self-sufficiency isn’t just about your physical gear; it’s about your state of mind. Staying properly hydrated and well-fed is one of the most effective ways to ward off “trail blues” and keep your spirits high during grueling sections of a trek. When your body is fueled, your mind stays resilient.
If you want to dive deeper into the psychological side of long-distance trekking—including how to handle the emotional highs and lows of a journey—check out our companion piece:
The thru-hiker’s mental health guide: Preparation, trail blues & post-trail depression
Finding your trail rhythm
Mastering your backcountry water and food systems is one of the most empowering steps you can take as a hiker. It transforms the wilderness from a place of potential “what-ifs” into a backyard where you feel completely at home. Whether you are a dedicated stove-user or a recent cold-soaking convert, the best system is the one that keeps you moving and keeps the trails pristine for the next generation.
Now, we want to hear from you. The hiking community is built on shared trial and error, and your experience could be exactly what a beginner needs to hear before their first big trek.
What is your “must-have” trail snack that keeps you going on a steep climb? Or, do you have a horror story about a clogged filter that taught you a valuable lesson?
Drop a comment below to share your tips, and if you found this guide helpful, share it with your hiking partner or your favorite outdoor group. Let’s keep the conversation—and the miles—going.
Discover more from The Wild Rx aka NatureCrank™
Subscribe to get the latest posts sent to your email.