The time I accidentally invented electrical aroma therapy: Proper fusing, breakers, and bus bars
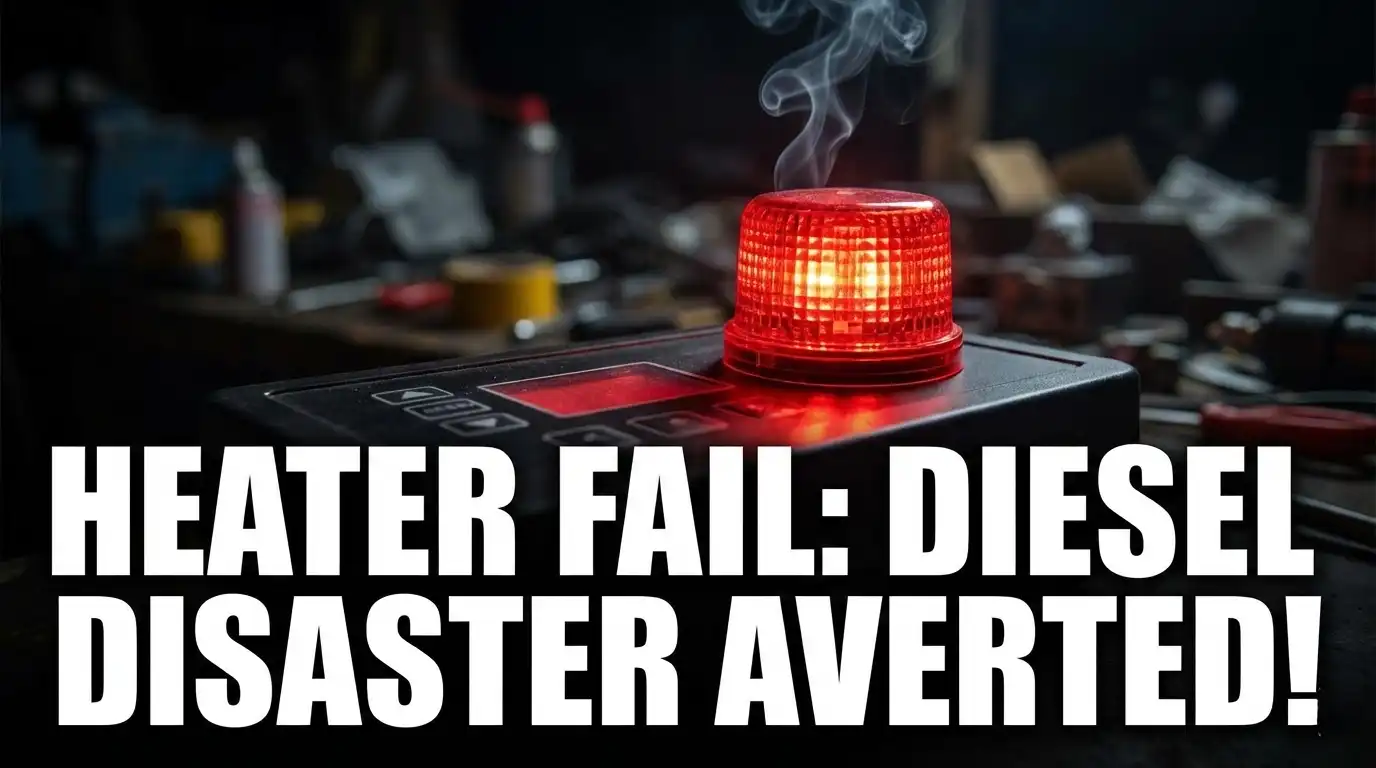
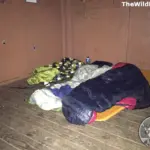
When I say that things just keep happening in my off-grid setup and life, I really mean it. Last night, my house decided to experiment with a terrifying new form of aromatherapy: burning electrical components and the smell of burning diesel fuel.
While I don’t normally recommend “electric incense” as a lifestyle choice, this scary near-miss reminded me of some critical lessons about diesel heater safety and DC electrical integrity. If you are running an off-grid solar system or a portable diesel heater in a van, RV, or tiny home, you need to understand that these systems are often only one bad connection away from becoming “performance art.”
What happened? The lights suddenly went out. Then came a few long, awkward seconds of silence. The inverter kept restarting like it was having an existential crisis.
That’s when I smelled it: Incense made of burning electrics and diesel.
Not the cozy, winter-heater smell. The “something is very wrong” kind of smoke. The inverter was flashing power-issue warnings like a Christmas tree from hell.
You can watch the video and see for yourself. Sadly, this isn’t my first major electrical issue.
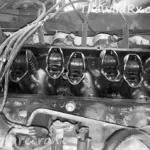
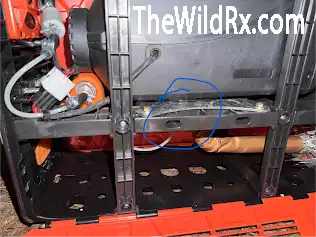
No fire, no explosions—just a dramatic reminder that modern heating systems are only one bad electrical moment away from becoming performance art. Once the adrenaline faded, I went looking for the culprit. Was it a loose terminal? A cheap fuse that decided to retire early? It turns out there was an electrical issue and also leaking exhaust or possibly just leaking diesel. I haven’t fully evaluated the machine and contacted customer service with a video.
All things considered, I’m lucky. I’m blessed. A few seconds of darkness, a brief dance with disaster, and a strong lesson in why safety systems deserve respect.
But let’s not stop there. What can you do to be safe? Let’s get serious.
Disclaimer: I am sharing my personal experience. Always consult with a certified DC electrician before modifying your power system.”
Safety first: How to not become a statistic
While I got lucky, “luck” isn’t a safety strategy. if you’re running an off-grid setup or a diesel heater, these are the non-negotiables. This also applies to your home.
The three sentinels: CO, smoke, and oxygen
Don’t just rely on one. you need a multi-layered defense:
- CO detector: CO is a silent killer—colorless and odorless. Place this at eye level (about 5 feet) on a wall. Since CO mixes evenly with air, you want it where you breathe. Always follow your specific detector’s manual, as some sensors are optimized for ceiling mounting.
- Smoke detector: This should be at the highest point of the ceiling because smoke rises.
- Oxygen depletion sensor (ODS): If you’re in a very tight space (like a van or tiny home), an ODS can alert you if oxygen levels drop too low. However, ventilation is your best friend here. always keep a window cracked or a vent open. Many portable heaters have these already.
Pro-Tip: For the best protection, use interconnected alarms in your home. When one sounds (e.g., in the basement), they all sound (e.g., in your bedroom).
Smoke detector placement
Smoke alarms should be installed to provide early warning as smoke rises and spreads along the ceiling. While an RV is small, my preference is to take as many safety precautions as possible.
- Where to install
- In every bedroom: Essential for waking you up if a fire starts behind a closed door.
- Outside every sleeping area: Typically in the hallway leading to the bedrooms.
- On every level of the home: Including the basement and finished attics.
- Large rooms/hallways: If a hallway is longer than 30–40 feet, install a detector at both ends.
- Specific positioning
- On the ceiling: This is the preferred location. Mount it at least 4 inches away from any side wall.
- On the wall: If you must wall-mount, place it 4 to 12 inches down from the ceiling.
- Avoid “dead air” spaces: Do not place them in the very corner where the wall meets the ceiling, as smoke may not circulate there.
- Areas to avoid
- Kitchens: Keep them at least 10–20 feet away from cooking appliances to prevent “nuisance alarms” from steam or burnt toast. Trust me. Steam and cooking in general will annoyingly set off a smoke detector in an RV.
- Bathrooms: Stay 3 feet away from doors to bathrooms with showers (steam triggers them).
- Drafty areas: Avoid placing them near windows, ceiling fans, or HVAC vents that could blow smoke away from the sensor.
Carbon monoxide (CO) detector placement
CO is often called the “silent killer” because it is odorless and colorless. Its placement focuses on proximity to sleeping areas.
- Where to install
- Outside each sleeping area: Specifically, within 10–15 feet of bedroom doors so the alarm is loud enough to wake you.
- On every level: Just like smoke alarms, every floor needs one.
- Near attached garages: If you have an attached garage, place a detector within 10 feet of the door leading into the house.
- Specific positioning
- Height: Unlike smoke, CO mixes with the air. You can place these on the ceiling, high on the wall, or at eye level. Some experts recommend “knee height” (the height of your nose when sleeping), but follow the manufacturer’s specific instructions for your model.
- Combination Units: If you use a Smoke/CO combo unit, it must be mounted on the ceiling to properly catch rising smoke. I prefer dedicated units for smoke and CO detection.
- Areas to avoid
- Fuel-burning appliances: Do not place them directly next to a furnace, water heater, or fireplace. Keep them at least 15–20 feet away to avoid false alarms from tiny, harmless amounts of CO emitted during startup.
Summary comparison and placement
| Feature | Smoke detectors | CO detectors |
| Primary goal | Detect rising smoke/heat | Detect toxic gas buildup |
| Inside bedrooms? | Yes (Every bedroom) | Optional (but recommended) |
| Outside bedrooms? | Yes (Immediate vicinity) | Yes (Within 10–15 ft) |
| Every level? | Yes | Yes |
| Best mounting | Ceiling (4″ from wall) | Wall (Eye level) or Ceiling |
| Replace every… | 10 Years | 5–10 Years (Check label) |
Electrical integrity: Fuses and breakers (and bus bars)
Fuses are there to protect your wires, circuits, and equipment. Don’t operate a system without them. Fuses and breakers are not the same and actually a little different. Breakers are good but don’t forget the fuses. Also, please have a profession advise you. Placement of fuses is a rule but the breaker will often depend on your setup and individual needs.
A great place to learn and get questions answered is the DIY Solar Power Forum by Will Prowse. Feel free to ask questions here or join TheWildRx Community.
Pro tip: Always place the fuse on the Positive (+) wire. Fuses should be sized to be higher than the device’s normal draw but lower than the maximum current the wire can safely handle.
- The solar rule: Every line coming from your panels and going to your batteries needs a breaker or fuse. use DC-rated breakers (never swap in an AC breaker from a hardware store—they won’t extinguish a DC arc, which can lead to a fire).
- Inverter sizing: Ensure your main fuse is rated for the maximum surge of your inverter. For a 12V system, a 2000W inverter can pull over 150 amps and more during surges. If your fuse is too small, it’ll blow; if it’s too big, your wires will melt before the fuse cares.
Fuse locations
- Between the solar panels and charge controller: Place fuses on the positive side and fuse each string of panel. If one string shorts out, the others can dump all their power into the faulty string, melting the wires.
- Between the charge controller and battery: This is one of the most important fuses. If the charge controller fails or the wire shorts, the battery can send thousands of amps through that wire instantly.
- Between the battery and the inverter: This is where the highest current flows. A short here is extremely dangerous due to the massive energy stored in the battery.
- Between the battery and DC loads: If you are running DC appliances (lights, fans, USB chargers) directly from the battery, you should have a fuse block.
Breaker locations (always positive again)
These are ‘sort-of’ optional, but serve a great purpose and add secondary protection to the fuses. DC power does not behave the same as AC (in your traditional home). Think easy cutoff switches.
NEVER use AC breakers! Standard household AC breakers are designed to “snuff out” an arc as the current naturally crosses zero (60 times a second). DC current is constant and doesn’t cross zero, meaning an AC breaker may fail to stop a DC arc, potentially melting or catching fire.
Only use breakers explicitly labeled for DC.
- Solar panels to charge controller: A breaker here is highly recommended because it allows you to “turn off” the solar panels safely before working on the controller.
- Charge controller to battery: This is the “Output Breaker.” If a short occurs on the wire between the controller and the battery, you want the breaker to trip near the battery (the source of the massive fault current).
- Battery to the inverter: This is usually the largest breaker in your system. Place within about 6-12 inches from the battery terminal.
Again, have a qualified electrician with a lot of experience in DC voltage. Trust me, this experience is a must because regular electricians don’t often deal with DC, and I have met many who recognize their limitations. A fire or death isn’t worth the risk.
The difference between breakers and fuses
While both devices serve the same purpose—protecting your home from electrical overloads and short circuits—the fundamental difference lies in how they break the circuit and whether they can be reused.
A fuse is a sacrificial device containing a thin metal filament that physically melts when too much current passes through it, permanently breaking the connection; once it “blows,” it must be discarded and replaced with a new one.
In contrast, a circuit breaker acts as a resettable switch that uses an internal electromagnet or bimetallic strip to “trip” and flip the switch to the off position. Because it doesn’t destroy itself to stop the electricity, you can simply flip the breaker back to “on” once the issue is resolved, making it the more convenient and modern standard for home safety.
When dealing with sensitive electronics and solar systems, a fuse more quickly interrupts a DC arc, which is harder than AC but when you have large battery banks, a resettable breaker is great because it can save a high-amp fuse. I highly recommend you use both in your system. Different setups often need different switches or breakers. For example, if you’re running multiple power banks, you need cutoffs and breakers. Another piece of equipment that is important is the bus bar.
Using bus bars with your solar setup
Bus bars are the “unseen heroes” of a solar setup. Think of them as a central distribution hub—like a power strip for your batteries—that allows you to connect multiple high-power components (inverters, chargers, and battery banks) cleanly and safely.
Why use bus bars?
Without bus bars, you end up “stacking” multiple ring terminals on a single battery post. This is dangerous because:
- Heat buildup: Poor contact between stacked lugs creates resistance, which generates heat.
- Imbalance: If you have multiple batteries, stacking cables on one can cause that battery to work harder than the others, shortening its life.
- Complexity: It becomes nearly impossible to organize fuses and disconnects for every component.
Best practices for placement
A standard DC system uses two bus bars: Positive (+) and Negative (-).
- Proximity: Mount bus bars as close to your battery bank as possible (usually within 12–24 inches). This keeps the main high-current cables short, reducing voltage drop.
- The Shunt Rule: On the negative side, the battery must connect to a battery shunt (for monitoring) before it reaches the Negative Bus Bar. Everything else (inverter, solar, DC loads) connects to the bus bar so the shunt can “see” all the power moving in and out.
- The Fuse Rule: On the positive side, every single wire leaving the bus bar to a component should have its own fuse or breaker. Remember, the battery itself, is fused at the post) .
Usage & connection order
When connecting cables to a bus bar, the order on the stud matters for efficiency:
- Highest current first: Place the largest lug (usually the inverter or battery cable) at the bottom, directly against the bus bar surface.
- Lower Current Above: Smaller lugs (solar charger, DC fuse block) go on top of the larger ones.
- No “sandwiching”: Never put a washer between two lugs. Lugs must touch each other (or the bar) directly to ensure maximum conductivity.
Sizing your bus bar
Bus bars are rated by amperage. You should size your bus bar to handle the maximum possible current it will ever see at once.
- The Simple Rule: Choose a bus bar with a rating equal to or higher than your inverter’s maximum draw.
- The Professional Rule: If you are charging (Solar) and discharging (Inverter) at the same time, the bus bar technically carries the “net” load, but for safety, most DIYers size it to the maximum output of their battery bank or inverter.
Comparison tables
Fuses and breakers
| Feature | Fuse | Circuit breaker |
| Action | Melts a metal filament | Trips a mechanical switch |
| Reusability | One-time use (must be replaced) | Multi-use (can be reset) |
| Response time | Very fast (better for sensitive electronics) | Slightly slower |
| Common use | Older homes, small appliances, cars | Modern homes, main service panels |
| Cost | Cheap to buy, but cost adds up | More expensive initially |
The bus bar
| System Size | Recommended Bus Bar Rating |
| Small (12V / <1000W) | 100A – 150A |
| Medium (12V or 24V / 2000W) | 250A |
| Large (48V / 3000W+) | 400A – 600A |
The “no-knockoff” policy
This is where I learned my lesson. There is a massive difference between a $50 Amazon special and a $150 reputable component (like Blue Sea, Midnite, or Victron).
- Arc quenching: Quality DC breakers are designed with “magnetic blowouts” that literally pull an electrical arc apart to extinguish it. cheap knockoffs often lack this, meaning if they trip under a heavy load, they might just keep arcing inside the plastic until they melt.
- Reliability: Chinese knockoffs often use inferior alloys that get hot under normal loads. if it feels hot to the touch while running, it’s a fire hazard waiting to happen.
I had a solar charger catch fire a few years ago. It wasn’t exactly a knockoff but there are three important things here: Reliability, safety, and efficiency. I’ll always recommend Victron for this reason.
Deep-dive FAQ: AC/DC electrical safety
Please note since I used my disiel heater as an example, you can read my diesel heater usage guide for more info.
Final thoughts: Don’t let your setup become “performance art”
Living off-grid is an incredible journey, but it’s one that requires constant vigilance. My “electric incense” scare was a humbling reminder that even seasoned DIYers can be caught off guard by a loose terminal or a failing component. Safety isn’t a “one-and-done” task—it’s a habit of maintenance.
Whether you are building a weekend warrior van or a permanent tiny home, treat your electrical system with the respect it deserves. Buy the quality components, over-spec your wires, and for the love of all things cozy: test your detectors monthly.
I want to hear from you!
We learn best when we share our “near-misses” and victories. I’m curious about your experiences:
- Have you ever had a “scary smell” moment in your rig? What was the culprit?
- Which safety device do you consider the most underrated in an off-grid setup?
- Do you have a specific brand of DC components you swear by for reliability?
Drop a comment below and let’s get the conversation started. Your experience might just be the piece of advice that saves someone else’s setup (and sanity)!
Ready to audit your rig? Check out my Diesel Heater Usage and Safety Guide for a deep dive on keeping your heater running clean all winter long.
Discover more from The Wild Rx aka NatureCrank™
Subscribe to get the latest posts sent to your email.